INTERNET
To view the University Networking and Computing Policies...
Wireless Internet on Campus
sau - This is a network for connecting all wifi devices for students and employees. please do not connect to sau-guest if you are a student or employee
sau-iot - This is a network for connecting devices that do not support the username and password connection of sau. Visit go.southern.edu/wifi to get your password to connect your devices to the sau-iot network. (ex. smart tv, apple tv, printer, Chromebook.)
sau-guest - This network is for non employees and students. Please do not connect to this network unless you are a guest.
Android devices require extra steps in order to connect to the sau network. Upon selecting the "sau" network, a page similar to the following will pop up.
The "EAP method" should be set to "PEAP".
The "Phase 2 authentication" should be set to "MSCHAPV2".
The "CA certificate" should be set to "Use system certificates".
The "Online Certificate Status" should be set to "Do not verify".
For the "Domain" you should type in "southern.edu".
For the "Identity" you should type in your Southern username. This does not include the "@southern.edu" at the end.
The "Anonymous identity" should be left blank.
For the "Password" you should type in your Southern password.
When you click "Connect", it will momentarily tell you that there was an issue. After a few seconds you will be connected.
Ethernet Device Registration
Connect your device to Ethernet: Use an Ethernet cable to connect your device (e.g., laptop, computer) to the Ethernet port provided in your dorm room. Make sure the cable is securely connected.
Open a web browser: Launch a web browser on your device. You can use popular browsers like Google Chrome, Mozilla Firefox, or Safari.
Wait for approximately 30 seconds: Give your device a few moments to establish a connection with the network.
Log in with your student ID: After the connection is established, a web page should automatically open. If not, proceed to the next step. On the web page, you will be prompted to log in with your student ID. Enter your student ID credentials to proceed.
If a web page does not pop up: In case the web page doesn't automatically open, you can manually access it by following these steps:
- Open a new tab in your web browser.
- Enter the following link in the address bar: https://ipregister.southern.edu
- Press Enter or Return to navigate to the link.
---READ THIS---
When registering, make sure you submit the ethernet mac address.
Ignore the Wi-Fi password given since you are registering an Ethernet connection.
---------
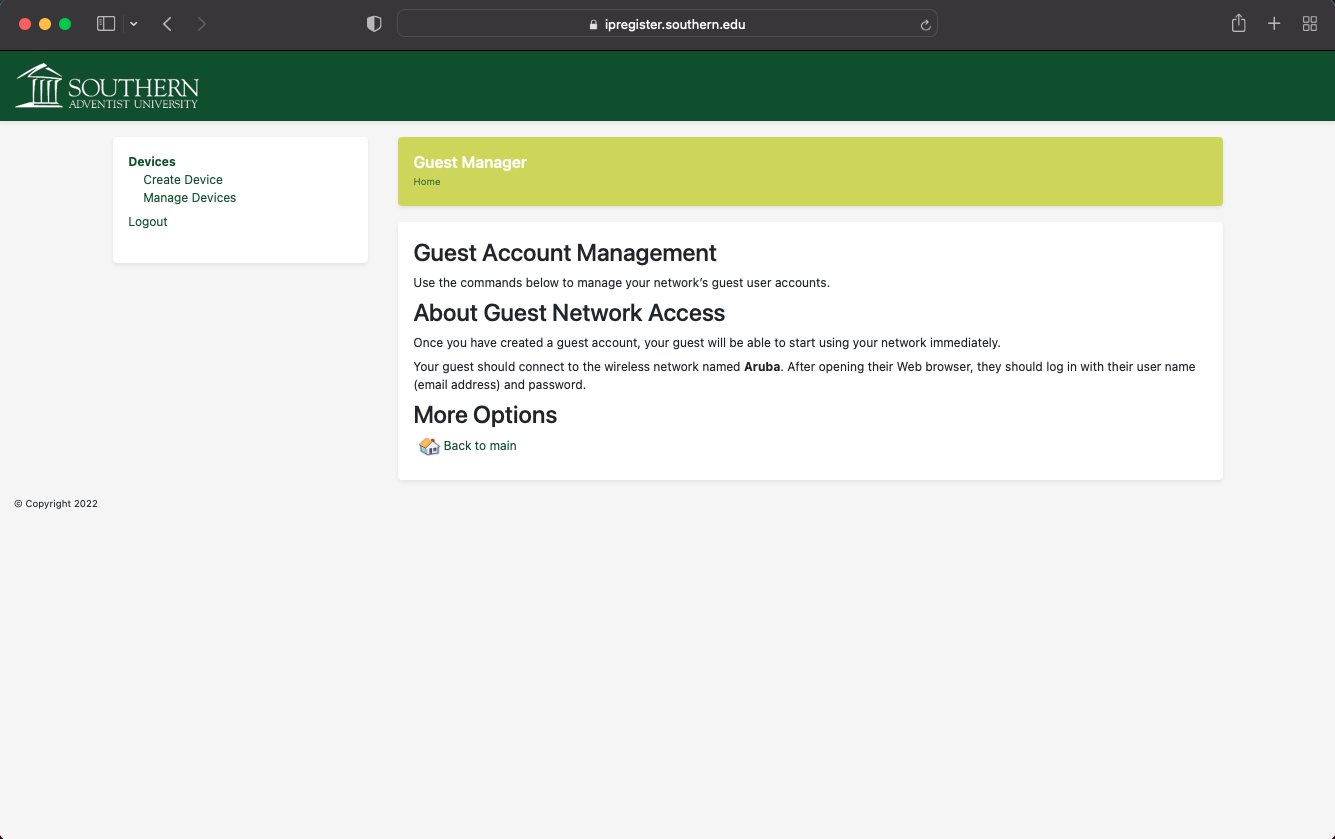
Once logged in, you will see the following screen:
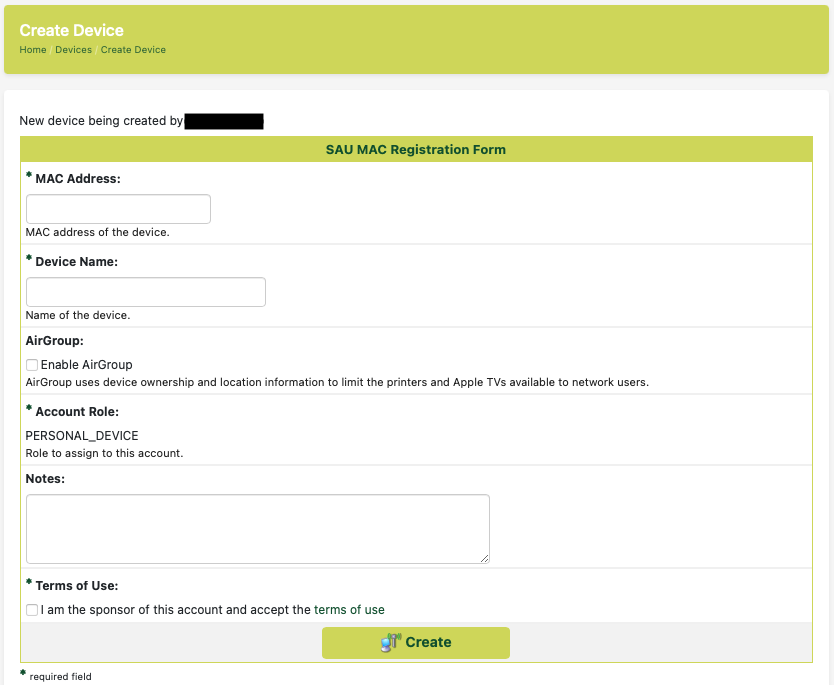
Next, in the white box on the left click on “Create Device”. This will take you to the device creation page pictured below:
Then, on this page you can start with the Ethernet “MAC Address” box. Every device has a unique MAC address. You’ll have to find it yourself because
each device has a different way of hiding them from you but a common place is in the
settings of your device.
For the “Device Name” box just write down whatever you want the device to be known as. This is only for
your reference.
If the “Enable AirGroup” option is off (which it is in the above picture), your device will not be discoverable by other devices. For example, you couldn’t connect to a wireless printer through the network. A device
such as a Nintendo Switch would be unaffected.
- A “Personal” device can only be used by the devices used by your account. This is regardless of what is in the “Shared With” box.
- A “Shared” device can be used by whoever you specify in the following “Shared With” box. If the “Shared With” box is left blank, all users will be able to use your device. Make sure to enter your username if you wish to access the device too.
You are able to select an "Account Role". If the device is a printer then select "Printer". Otherwise, leave it on "Personal Device".
The “Notes” box is an optional box for you to use to keep track of information about that device.
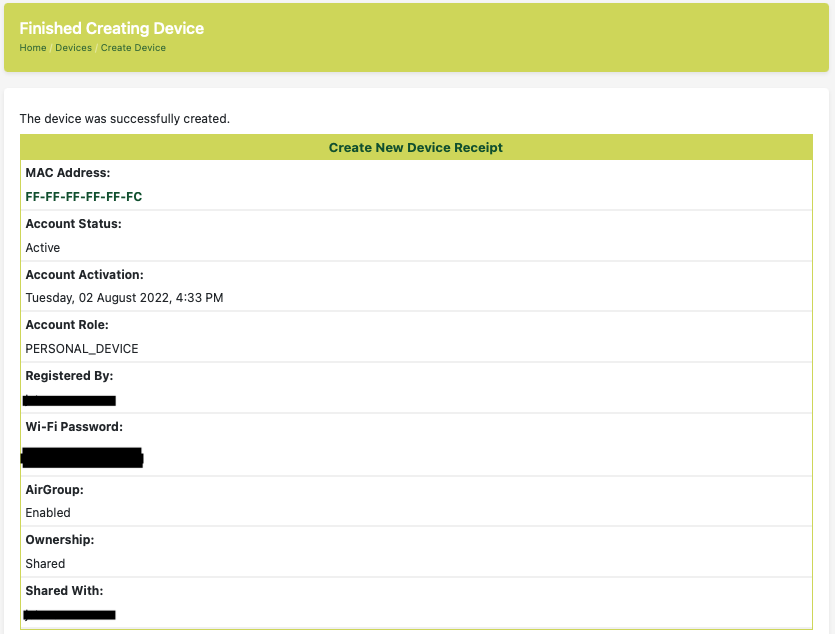
Finally, you need to click the box to agree to the terms of use then click “Create”. Your “Device Receipt” will pop up, allowing you to review the device. 
How do I Modify or Delete Devices?
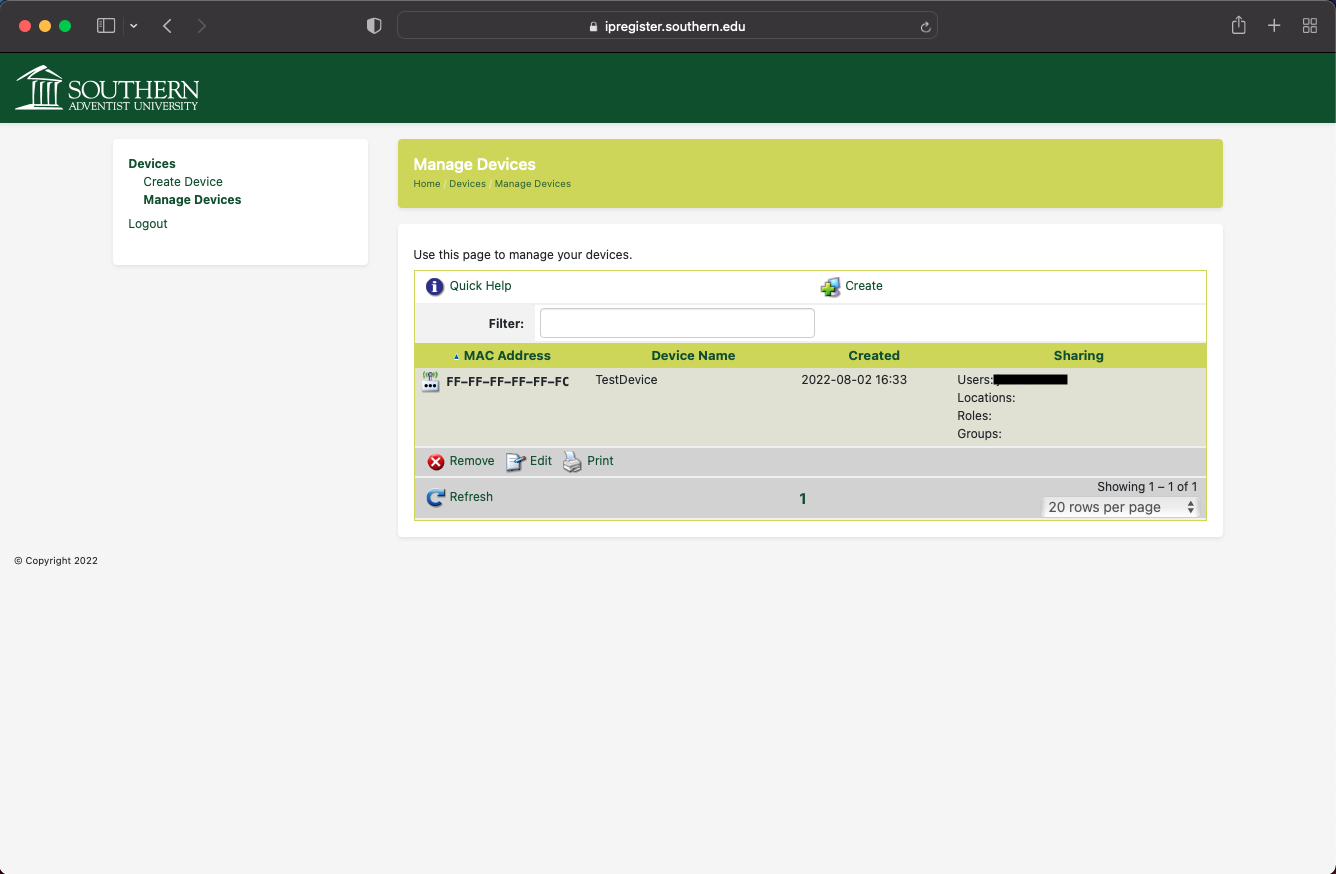
In the white box on the left side of the page there is an option that reads “Manage
Devices”. Clicking this brings you to the page seen above.
Selecting “Edit” takes you to a screen where you are able to edit the specified device.
Selecting “Remove” allows you to either disable the network connection to the device
or delete the device entirely, requiring you to register it again.
Wireless Internet Guest Access
To access the guest network, you must first attempt to connect to "sau-guest". You
will be redirected to a page where you can enter your name, phone number, and email.
Once finished, you will be sent a text message containing your login information.
Your access expires after 24 hours, at which point you must log in again.